There are also various passive methods fishing. They are quite far from fishing as a sport, but are very effective if you need to catch fish for lunch or dinner.
One of the oldest and most widely known methods of passive fishing is jigging.
The zherlitsa can be compared to a “trap” for fish. Structurally, the summer vent consists of:
- “machine” - shore fastening;
- reel - the basis for winding fishing line;
- the fishing line itself;
- leash;
- sliding weight on a swivel;
- retaining rings;
- hook with live bait.
The idea is that summer girder for pike it is simply an underwater “leash” on which live bait - small fish like bleak, roach, gudgeon, etc. - walks. The live bait is attached to a hook, which is tied to a metal or Kevlar “pike” leash. The length of the leash is 10-20 cm, which, in turn, is attached to a strong fishing line, most of which is wound around a slingshot, a piece of plywood, or a scrap plastic bottle or another reel. The reel is attached to shore equipment, most often a tree branch or simply a pole dug into the soil.
A fishing line 10-15 meters long is tightly wrapped and secured in a reel so that with the slightest tug from below it begins to unwind. Most often, the fishing line is simply inserted into a groove cut in a piece of plywood or wood. Can be used spinning reel with little unwinding force. The point here is that the pike - and the girder is used primarily for pike in the summer - does not feel resistance when it begins to swallow the bait, and does not throw it.
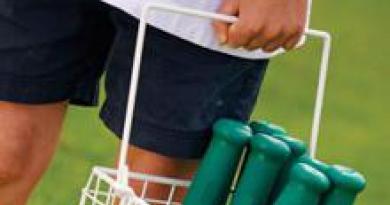
Photo 1. Factory sample of the girder.
How to make a summer zherlitsa?
Do-it-yourself summer baits for pike, as practice shows, are no worse than purchased ones; they can be made right at the fishing site and therefore save a lot of money. We will now tell you how to make them correctly.
There are a lot of options for such gear, each fisherman makes them to his own taste. The most simple homemade product- option described above.

Photo 2. Options for girders from an old fishing book.
You need to take a wooden flyer, a piece plastic pipe, strong plywood, or any other object around which the fishing line can be wrapped. Make a reel - at least 20 meters - secure the fishing line in the slot on the reel so that a sufficient length of the line goes into the water. The total length of the fishing line will be 30-35 meters, depending on the depth at which you are fishing. Measure the depth and attach a corresponding sinker to the end of the fishing line. The weight of the sinker is up to 15 g, it is attached using a sliding method, on a swivel. A leash with live bait on a double or triple hook No. 1-2 according to the European classification is attached to the same swivel.
Advice: If you put a live bait on a hook not through the back, but through the mouth, it will live longer, and therefore there is a greater chance that a predator will have time to peck at it. In this case, the correct bait for a live bait is when the shank of the hook is in its throat.
The leash should be pike, Kevlar or steel. Please note that large pike perch can bite even such leashes.
Catching pike with girders in the summer is when the live bait walks freely on a leash, and the line, since it is not tense, the pike does not see. When she grabs the prey, she pulls the line out of the groove on the reel, but does not notice this because there is no tension. Nothing prevents it from swallowing its prey, the line unwinds - the pike hooks itself.
You can make summer rigs for pike with your own hands in another version, using an inertia-free reel instead of a reel. The main thing is that the unwinding force is not too strong, but not too weak. You can adapt to it the one removed from the purchase winter zherlitsa or a home-made signaling flag on an elastic leg that hooks onto a reel. As soon as it begins to unwind, the support will straighten, and the flag will tell you that a bite has occurred.
How to install?
Pike rigs in summer are a little more difficult to install than winter ones. The main thing is to firmly secure the reel. It is best to tie it to a strong, dry branch hanging over the water. You can use a pole or pole dug into the ground. An ordinary hard spinning rod or fishing rod can serve as a base; the main thing is to secure it firmly to the shore. You can’t just leave it on the sand; if you don’t watch it, you can lose all your gear. If the bottom is pebbly or rocky, you can use a reel with good positive buoyancy, which you can simply tie to a large stone or other heavy object and let it float, but this is an extreme case. Pike are very shy, so it is advisable to avoid any foreign objects in the water. The point of catching pikes with girders in the summer is precisely that this tackle does not arouse suspicion among the fish, which is why pikes and perches are caught well with it.
Advice: It is very important that the bottom in the place where you plan to launch the live bait is not overgrown with grass too thickly, otherwise it may hide, and the fishing line and leash may get tangled. If there are too many aquatic plants, some will have to be torn out, freeing up an area of about a meter in diameter.
Our homemade product must be very durable, because... pike is a strong fish and may try to rip its rightful trophy off the hook. Choose strong, dry poles for the base, hardened hooks and thick fishing line 0.3-0.4 mm thick. It can be thicker when fishing with a spinning rod or a fly rod, because... The fish does not see a loose line in the water.

Photo 3. Installation diagram of the vent on the reservoir.
Fishing technique
Effective fishing with girders in summer cannot take place without appropriate preparation. Firstly, you need to catch live bait in advance - small roach, bleak, crucian carp or other small fish. There should be plenty of them, because pike or pike perch can take the victim off the hook and leave. In addition, river predators, especially fanged ones, often tear up live bait so that it is no longer suitable for bait - they do not eat carrion.
The size of live bait for pike is approximately 10 cm in length. They need to be kept in a container of water. Optionally, you need to have a supply of hooks of different sizes - for nozzles of different sizes.
Secondly, you need to decide who and where to catch, and find the appropriate place. In summer, pike and pike perch wait for prey at the difference in depth between the hole and the shallow, at the border where cattails, sedges or reeds grow near the shore, in the “gaps” of thickets of water grass, and so on. The place should be quiet, away from noisy beaches, marinas, etc. Ideally, it will be possible to fit the pole with the equipment into the surrounding landscape so that it hardly stands out against its background - in the reeds, among the branches descending to the water, especially willow, etc. As a rule, garrisons set several “water traps”, 4-5 at a distance of 20-30 meters from each other.
When installing, you first need to measure the depth by lowering the sinker to the bottom, and then wind the fishing line a couple of turns so that it is free.
After this, it’s enough just to keep all the baits in sight in order to react in time to a bite. It is optimal to have a boat for this.
Zherlitsa is a method of fishing predatory fish on live bait, most often pike. The fisherman installs several (up to a dozen) special devices sequentially on the reservoir and leaves, monitoring the bite alarm remotely.
Purpose of the zherlitsa
This tackle was invented for catching cautious predatory fish (,). No matter how careful the fisherman is, he cannot move absolutely silently, especially on ice. Sounds, play of light and shadow in any case alarm the fish. She can simply move away from even the most attractive bait. If you use a girder, the fish acts boldly, and the chances of catching it increase sharply.
A classic girder is a device for catching predatory fish, which consists of:
- bases (racks);
- latch (signaling device) with a flag;
- reels with bracket;
The principle of its operation:
- The vent is installed on ice or other solid base.
- The fisherman equips it with live bait, lowers it into the water, and sets the bite alarm to the working position.
- The fisherman leaves.
- A predator approaches. He takes the bait, unwinding the line from the reel.
- At the moment when the reel begins to rotate, a device is triggered, releasing the bite alarm (a bright “flag”), which is visible from a great distance.
- The fisherman approaches or runs up to the device, manually pulls out the fishing line and pulls the predator out of the hole.
Types of girders
Even in the last century, a distinction was made between girders for ice fishing and girders that were used for fishing during the period open water, which few people remember these days. Currently, the term “zherlitsa” is used exclusively in relation to the winter versions of this catchable gear.
The girders differ in design:
- A vent with a round base that covers the hole.
- A vent with a base in the form of a single post.
- A zherlitsa, the base of which is made in the shape of a tripod. The hole remains open.
- A pier, the base of which is made in the form of a cylindrical axis (or another base that is laid directly on the ice), which serves as a base. The design uses a wooden spool for the main line, which is submerged in water.
There are incredibly many options for girders, both winter and summer. One can argue about the advantages and disadvantages of each type, but manufacturers most often offer to purchase vents with a round base that can cover the hole. This device allows you to immediately solve many problems, from the stability of the structure as a whole to the problem of protecting the hole from snow and frost.
Making a zherlitsa with your own hands
Zherlitsa - the simplest tackle, for the manufacture of which you will need a minimum of materials and tools with your own hands.
Possible options

For example, the option with a base in the form of a cylinder, in which the reel with the main fishing line is lowered into the water, is so simple that a junior school student can make it if he has such a desire.
Required:
- A piece of cylindrical wood (for example, a piece of fencing from a crib) up to 30 cm long.
- A piece of knitting wire with a cross-section of up to 5 mm.
- A spool of thread.
- Equipment for the harness (main, leash, hook).
You need to bend a frame from the wire on which the coil is installed. The frame is attached to the base using wire or a piece of braided cord. The simplest girder is ready.
How to catch more fish?
I have been active fishing for quite some time and have found many ways to improve the bite. And here are the most effective:
- Bite activator. Attracts fish in cold and warm water with the help of pheromones included in the composition and stimulates its appetite. It’s a pity that Rosprirodnadzor wants to impose a ban on its sale.
- More sensitive gear. Reviews and instructions for other types of gear can be found on the pages of my website.
- Lures using pheromones.
Other secrets successful fishing you can get it for free by reading our other articles on the site.
More complex designs, for example, with a round base covering the hole, it is more difficult to do, although not much.
- Classic zherlitsa.
Materials required for making a vent of this type:
- A piece of plywood, chipboard, foam plastic, durable plastic or penoplex with a thickness of 8 mm (plywood) to 30 mm (penoplex) with dimensions of 20x20 cm for making the base.
- A spring from an alarm clock or other clock for making a bite alarm. A spring insert for an officer's cap is also suitable.
- A piece of material for making a gatehouse.
- An inertial reel with a small diameter spool for storing fishing line.
- Gear equipment.
Step-by-step instruction
To make a girder you will need to perform the following steps:

- reel stand;
- guard mechanism, including flag.
Equipment of the girder
The equipment of the girder includes the following elements:
- Main.
- Sinker (deaf or movable).
- Leash.
- Hook.
Main line
Typically, monofilament fishing line is used in winter fishing, with a cross-section from 0.24 mm to 0.5 mm, and a length of up to 20 meters.
In such conditions, the braid, firstly, quickly rubs against the edges of the walls of the hole, and secondly, the wet braid is destroyed under the influence of severe frost.
In addition, in the equipment of the girder, it is recommended to make a wire insert in such a way that the wire is located at the border of water and air. This insert slightly weakens the reliability of the structure, but protects softer materials (monofilament line and braid) from destruction when ice forms in the hole.
Sinker
The shape of the sinker is not particularly important, unlike its weight. The sinker is selected in such a way that it holds the bait at a certain, required depth. This element of equipment can be either running or blind.
Leash
The leash can be made of monofilament fishing line. However, many fishermen use metal products as a leash. It is difficult to give advice, because each fisherman chooses the material from which the leash should be made independently.
Hook
To attach live bait, you can use either a single, double or triple hook. Its parameters are selected based on the size of the nozzle.
How to equip a zherlitsa?
To equip the vent, you need to complete the following steps:
- After the hole is prepared, you need to place the bait on the hook and carefully lower the bait into the water.
- The fishing line is lowered to the required depth and passed through a slot in the base of the girder.
- The spring with the flag is bent and tucked into the reel so that when the fishing line is pulled from the reel, the spring straightens, releasing the alarm flag.
- The base of the vent is sprinkled with snow to create a thermal insulation layer.
At the moment of a bite, the reel will begin to move, releasing the spring. The spring will straighten, raising the flag high. It usually hooks itself on such gear. But you should hurry to pull the tackle out of the water.
Fishing is always a mystery. Sometimes the answer turns out to be simple and obvious, like a zherlitsa - a simple and economical tackle for catching a predator in any body of water.
SHOW
COLLAPSE
Do you like to catch pike? How often do you catch it in winter? Many people are ready to sit for hours on the shore of a reservoir waiting for prey and not catch anything. But you want results... There is a way, in addition to active fishing, to get a pike and increase the chances of success several times - by installing a girder. It is a tackle for passive fishing. You can even make it yourself. Let's see what options for pike fishing rods our fishermen have invented.
The main classification divides zherlitsy into summer and winter options. It should be immediately noted that winter fishing has become much more widespread. Camouflage is one of the key conditions - the forests must blend in color with the water, the hook must be pressed tightly against the bait and be white.
There are two types of vents - those that are installed on the ice, and those that are installed with an under-ice forest clearer.
A small twig, which is mounted near the hole, is the basis for the simplest ice vent. A fishing line is attached to it. Various small materials - a branch or a piece of cloth - serve as a signal that the fish has grabbed the bait. This design is always installed on top of a drilled hole.

A fishing line with a hook and a leash is attached to a reel. The live bait is placed on the hook, after which it is lowered into the hole. Next, the flag is bent under the coil, so that it does not allow it to take a vertical position. After the fish grabs the bait, the line stretches and the reel begins to rotate - only then does the flag become vertical. The time has come to hook the predator - this is done so that the hook is securely attached to the pike.
Zherlitsa with underwater forest clearer
The peculiarity of this design is that there is no bite alarm, and therefore fishing of this type refers to passive fishing. As a forest clearer, you can use a splintered wood bag. The scaffolding is wound around it and lowered under the ice.
The good thing about the type of fishing described above is that the part of the fishing line that is not used at the forest clearer will not freeze. Regardless of weather conditions, the supply of forests will be in full combat readiness. Of course, the lack of signaling about caught fish is a significant design flaw.
Several options for do-it-yourself winter vents
Option No. 1 - classic
- The gatehouse's guardhouse;
- Reel holder;
- Gear stand;
- Coil.

Winter modification
- Drinking mineral water? Great - take two of these bottles and cut them crosswise, the main thing is that they are different in shape.
- When trying on, the upper part of one plastic bottle must be placed on the lower part of the other.
- Using an awl, you need to make a hole in the top of the bottle (in the cork) and make two more holes in the neck - this will be needed when you tie the fishing line. Also make a hole in the center of the bottom of the bottle.
- The next stage is assembling the vent. You will need fishing line and cord - thread the fishing line into the bottom of the bottle - this is how you will construct top part future zherlitsa. In order for you to be able to hang the rope on a stick above the hole, you need to make a loop on the fishing line on one side and tie a knot on the other.
- Pass the fishing line into the upper part of the bottle through the cork - the lower part of the vent is obtained. Step back about twenty centimeters from the knot and make another exactly the same knot.
- The next step is to secure the working line to the two holes. Wrap the required amount of it with a sinker and a tee, insert the lower part of the vent into the upper one.
At this point the girder is ready. When the bait is grabbed, the lower part of the rod will definitely fly out of the upper one. For convenience, we recommend painting the top and bottom parts with different colors. The advantage of this design is its simplicity and low cost.
Catching toothy predators in winter is one of the favorite pastimes of anglers of all ages and skill levels. Simple and inexpensive girders allow you to confidently catch even trophy specimens. It's even possible successful catch in the wilderness. A simple rig for pike, however, has a lot of nuances, knowledge of which will not hurt fishermen.
The structure of a typical girder
The gear is extremely simple. In lean years, fishermen collected it from everything they could get their hands on. Typical arrangement of a pike rig in winter:

This diagram describes the classic design of a winter vent. There are a great many types of equipment installation.
The principle of operation of the gear
 The predator, attracted by the live bait attached to the hook, grabs it and jerks to the side, unwinding the supply of fishing line on the reel. At this time, the flag, previously fixed by the coil, straightens, signaling a bite. Further options are possible: after waiting for a certain pause after the flag “lights up”, the angler makes a hook, the pike hooks itself, swallowing the bait deeply, or gets away after pricking itself on the hook.
Types of girders
There are several types of pike bait. They all differ from each other, usually in the method of installation on the ice or the placement of the fishing line. The fisherman is free to choose on his own, how can he equip a vent for winter fishing:

Self-Gear
It is best to assemble the girder at home, before going fishing. On ice and in cold weather, installing a girder for winter fishing is much more difficult:

Rules for successful fishing
Successful fishing requires the ability to use your gear correctly.. Knowledge of little fishing tricks about how and where best to place the girders will also not be a hindrance in this matter:

Having arrived at the reservoir and having decided on the place of fishing, you should drill a sufficient number of holes corresponding to the number of girders the fisherman has. Don't forget about fishing regulations, which may limit the number of available fishing poles. Usually this is 5-10 pieces. Between the holes you need to make such a distance that would not allow you to confuse neighboring gear when biting. After the live bait has been released to a given depth and the girders have been installed, sprinkle the holes with snow and wait for the flags to “light up”. Good luck!
The zherlitsa is one of the oldest fishing devices for fishing for predatory fish. Invented hundreds of years ago simple design and today it surpasses many modern equipment in efficiency. During this time, it has remained virtually unchanged, except that it has been slightly modernized, and as for its popularity among predator hunters, there is hardly any other gear that can compete with it.
So what is its secret, maybe in the design? Let's try to figure this out, and at the same time consider how to make a zherlitsa with your own hands.
What is a vent and what is it intended for?
This simple tackle is designed for catching predatory fish exclusively with live bait. It may have several design options, but the essence comes down to one thing: the predator is presented with a bait mounted on a hook connected by a fishing line to a fixed base, which, as a rule, is located above the water. Typically, fishermen use several poles. Their number can be any, as long as the area of the reservoir and the capabilities of the fisherman allow.
Despite the fact that today you can buy any tackle in the store, fishermen prefer to make girders with their own hands. This is absolutely not expensive and takes very little time. A good fisherman can have a dozen and a half girders in his arsenal. If you know where to look for a predator, this amount is enough to get a pretty good catch. Making girders with your own hands is gradually developing into a kind of hobby for some fishermen. Making these tackles themselves, craftsmen constantly modernize them, bringing them to perfection.
Types of girders
All girders can be divided into two main types:
- winter;
- summer
The former, in turn, are divided into above-ice and under-ice. Winter designs are more common and popular than summer ones, which are Lately are being replaced by more modern means of fishing.
There are three types of winter girders:
- with a flat base;
- on a vertical stand;
- "Taganok".
Flat base racks
The most common are vents with a flat base. They have a simple design and, unlike vertical and Taganka ones, are easy to install. In addition, such girders can be made with your own hands within 15-20 minutes from scrap materials.
This type of gear consists of a wooden or plastic platform on which there is a reel with fishing line and equipment, as well as a signal flag that “shoots” when bitten.

Advantages:
- simple design;
- easy replacement of structural elements;
- quick and convenient installation on any surface;
- the ability to cover the hole to prevent sunlight and freezing.
Flaws:
- in the presence of strong wind, they can shift without additional load;
- the base may freeze into ice in severe frost;
- good factory models are quite expensive.
Vertical vents
Vertical girders work on the same principle, but their entire mechanism is not located on a flat base, but on a stand, which is installed in snow compacted near the hole. This, in fact, is their only drawback: without snow, installation is impossible.
A vertical vent with your own hands can also be made from available materials in a minimum period of time.
Advantages:
- when installed securely, they are quite stable;
- purchased models are significantly cheaper than flat ones.
Flaws:

"Taganok"
“Taganok” is a structure in the form of an aluminum tripod with a reel and a flag located on it. This zherlitsa is not often made by hand, as it requires certain metal processing skills and the availability of the necessary tools.
Advantages:
- compactness and ability to fold the structure;
- ease of transportation.
Flaws:
- a do-it-yourself vent can only be made if you have metalworking skills and the appropriate tools;
- poor stability in strong wind conditions.
Do-it-yourself flat ice trap for pike
Let us consider in detail the process of manufacturing a vent with a flat base. Let's start with the means and tools. We will need:

A flat pole for pike with your own hands can be made not only on the basis of a plank. A plastic or foam plate can also play its role. It is important that the platform can securely hold all elements installed on it.
In the center of the board we drill a hole with a diameter of 10 mm. We change the drill to 4 mm and make holes in the coil mounting plates. Using self-tapping screws, we screw the reel with the fishing line pre-wound on it to the edge of the board, positioning it so that the fishing line, unwinding from below, is directed towards the drilled hole.
When making zherlitsa with your own hands (winter), you should pay enough attention to the flag. If it is not factory-made, then we take a prepared steel plate or wire and bend its edge (1.5-2 cm) at an angle of 90 degrees. We apply this edge to the middle of the board on the opposite side of the coil and press it with clamps and screws so that the flag stands vertically and can be pulled out of the clamps with force. At its end any in a convenient way attach the red flap.
Now all that remains is to attach the weight and leash to the fishing line. That's the whole process of making a flat vent with your own hands. Vertical winter structures are made according to the same principle, only they have a different arrangement and fastening of structural elements.

Ice fishing for pike
Under-ice girders are used by fishermen to hunt predatory fish in two cases: when the gear is placed at night or during the day for a long time in severe frost conditions. Their essence lies in the fact that the entire structure is lowered into the water in order to avoid the gear freezing into the ice.
It’s even easier to make an under-ice rig for pike with your own hands. A base is taken in the form of a wooden strip or stick with a length of at least two diameters of the hole. We tie a thick fishing line in the middle, to the end of which we attach a piece of plastic or rubber pipe (or a hose), which has negative buoyancy. A thin cut 2-4 cm long is made from the bottom. The main fishing line is wound onto the hose. The tackle with bait is lowered to the bottom, the fishing line is pulled up and inserted into the cut, where it is fixed. The vent is lowered into the hole a few centimeters under the water, where it will be held by a load.
When biting, the pike will pull the fishing line along with it, it will slide off the cut and begin to unwind to its full length. You can determine the bite by the floating tube. A do-it-yourself under-ice vent can also be made in the form of a horn. Our ancestors used similar designs for fishing for pike and burbot. The principle of its operation is similar to that described above, only instead of a tube a small horn is used. A fishing line is wound around it, after which it sinks under the water with its horns down. The fishing line is also secured in a cut made in one of the horns. As you can see, making a winter vent with your own hands is quite simple. What about summer?
DIY summer girders
Summer girders are also used for catching predatory fish, however, unlike winter ones, they are installed not on ice, but above the surface of the water. Today it is rare to see such a design in action, but still some anglers continue to use them quite successfully.

Let's look at how to make a girder with your own hands for summer fishing for predators, using the classic “flyer” as an example. For this we need:
- a small wooden stag 10-15 cm long;
- fishing line 0.3-0.4 mm thick;
- olive weight (5-15 g);
- leash (steel or tungsten);
- treble hook (No. 6-8);
- drill with 8 mm drill bit;
- a piece of strong rope.
We cut the stag from hazel or willow. It needs to be thoroughly cleaned and sanded so that the fishing line does not get caught when unwinding. We drill a hole in the handle and thread a piece of rope through it. A thin cut needs to be made in one of the horns to secure the fishing line, as is the case with winter ice fishing rods. Now we wrap the fishing line around the horns, having first secured its end. We attach the weight and leash with a hook. That's basically it, all that remains is to install our vent.
Features of installing a summer girder
There are two ways to place the flyer: by tying it to a tree branch hanging over the water, or by placing a long pole on a steep bank. In the first case, we will need to either bend the branch, or climb onto it and tie our perch so that it hangs above the water. In the case of a pole, the “flyer” is tied to its edge, after which it is driven into the shore and tilted at the desired angle to the surface of the water. This option is more acceptable, as it allows you to completely control the gear.

So we figured out the designs of the vents. Agree that there is no difficulty in the process of making them yourself. In fact, making girders with your own hands is a mostly entertaining and creative process, because any design can be changed and adjusted to certain conditions, which, in principle, is what most fishermen do.