Replacing handles, legs, adjusting the length of ski poles are frequent procedures for skiers. Replace tips from winter to roller ones, change a worn handle, saw off ski poles - we will talk about all this in our article.
How to shorten ski poles?
Stick trimming tools:
- Building hair dryer or boiling water
- hot glue
- Hacksaw
- Masking tape or duct tape
Cutting ski poles always made from the side of the handle. In no case do not saw the stick from below, where it goes to a narrowing and the foot may not fall into place.
To properly cut sticks, measure the length of the sticks with the handle on and decide how much you want to shorten. Why with a hand on? Because each handle has its own seat and some handle sits deeper, some a little higher.
To shorten ski poles:
- Remove handle. The handle “sits” on hot melt adhesive, it needs to be heated and the handle can be easily removed. To do this, you need to warm it with a building hair dryer or lower it into boiling water for a few minutes. Before immersing the pen in boiling water, it must be wrapped in a bag so that the water does not spoil the cork material of the pen. When heating with a hair dryer, do not hold it at one point, constantly move the air flow and turn the stick so as not to melt the handle.
- Cut off excess length. A hacksaw cuts a stick from any material. To prevent the stick from exfoliating, it can be wrapped with masking tape or electrical tape at the sawing point.
- Put the handle back. Put some hot glue on the stick and put the handle on. If the glue hardened before you could put the handle on, you need to warm it up in the same way as when removing the handle.
How to change handles on ski poles?
Tools:
- Hairdryer or boiling water
- hot glue
The procedure is the same as the previous paragraph.
How to change tips on ski poles?
Tools:
- Hairdryer or boiling water
- Hot glue (not always needed)
The principle of replacing the legs is the same as replacing the handles. With paws, even a little easier. They do not need to be packed in a bag and usually do not need additional glue. The tips fit very tightly and the adhesive residue on the stick will suffice in most cases.
Video: trimming poles, replacing handles and replacing legs on ski poles
All procedures are clearly shown in the video from the Skate&classic channel. Thanks to Alexander for good video instructions.
Video from Skistart.com. Replacing tips without boiling water and a hot glue gun.
Go in for sports, move, travel and be healthy! 🙂
If you find an error, a typo, or you have something to discuss, write in the comments. We are always happy to communicate 🙂
Download video and cut mp3 - we make it easy!
Our site is a great tool for entertainment and recreation! You can always view and download online videos, funny videos, hidden camera videos, feature films, documentaries, amateur and home videos, music videos, videos about football, sports, accidents and disasters, humor, music, cartoons, anime, series and many other videos completely free and without registration. Convert this video to mp3 and other formats: mp3, aac, m4a, ogg, wma, mp4, 3gp, avi, flv, mpg and wmv. Online Radio is radio stations to choose from by country, style and quality. Online Jokes are popular jokes to choose from by style. Cutting mp3 to ringtones online. Converter video to mp3 and other formats. Online TV - these are popular TV channels to choose from. Broadcasting of TV channels is absolutely free in real time - broadcast online.
Here it is...let's get started tomorrow!
the question is, if a fiberglass stick does not twist from boiling water?
Everything turned out just like in the video. And I, like Dad again, GOOD WOMAN))))) Thank you for the video.
Thank you, I understand, I'll try.
Thank you, we shortened the daughter's sticks!)
A home-made bolt - in hardware, made of stainless steel, pick up the same diameter as the plug in the handle, with a semicircular cap for a hexagon.
Firstly, nothing will happen from boiling water with a pen. Secondly, to install the guard, the handle does not need to be removed. It is necessary to squeeze out a thin steel pin (its edge is visible on the side at the top of the handle). After that, take out the plastic cap (small round) from the upper cut of the bail and insert the steel adapter from the guard set in its place. After that, tighten the screw into the adapter. The set of branded guards should include both an adapter and a screw and an airplane for extruding the pin. The guard is put on the shaft without removing the rings and handles, at the bottom of the stick, it is easier to put it on. If the guards are not lek, or the old model, you do not have such an adapter. In this case, I used a stainless steel bolt, drilled a transverse hole in the bolt, as in a plastic cap that you remove from the handle, and fixed the guard with it. It is not good to screw a self-tapping screw on top, it interferes with the operation of the lanyard cordon mechanism, but in extreme cases a self-tapping screw can also be used.
the coach told us to unscrew the bolt from above. remove the protective cap. I will go to the Trial on Kuntsevskaya to the master, I myself did not manage to do it quickly. but I'm afraid to spoil it with boiling water. gotta put on the guards
Is it possible to remove the paw too? and if the handle is a cork, how to be?
removed the handle according to your recipe) everything is ok. I think, when landing the handle in place, it’s worth putting it on hot melt glue
thanks for the video, a couple of questions: straight boiling water-boiling water? I have a 11S carbon lek stick with a trigger, nothing will be broken there from boiling water?
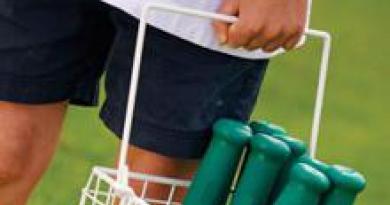
Experienced amateurs ski resorts, participants in competitions and Olympiads in long races using skis can ride them without using sticks. For them, it's a matter of habit. However, for a novice person who first stood up, they are the main support. With their help, you can not only maintain yourself in an upright position, but also move (push off) on a ski track, climb a hill, correctly assess the situation in poor visibility. Many skiers refer to them as "tactile sensors". An important role in the structure is played by the legs for ski poles (tips).
They are necessary in order to increase the efficiency of driving and maneuverability. Without them, it is impossible to push off normally, slow down or control your movements. They are also important not only when skiing on snow cover. AT last years Roller skis are becoming more and more popular. For this species, other tips will be needed that differ from those used in winter. The foot consists of a plastic platform and a metal tip. The tip itself must be sharpened after purchase. This can be done with a file or needle file.
You can also highlight paws for walking on asphalt without skis. They are rubber platforms with a pattern similar to car tires.
Selection of ski feet
If we talk about the choice of tips, their shape will change depending on the purpose:
Classic - used for walking on virgin lands. In this case, the area of the repelling part must be large enough not to fall into the fresh uncompacted snow.
Cross-country - special tips used on pre-prepared routes (competitions, demonstration races). The working area in such paws is less than in the classic versions.
How to replace yourself
In the event of a breakdown, loss of a metal part, or a change in the purpose of ski poles (transition from winter to summer version of roller skis), it is necessary to replace the legs for ski poles. You can use the services of a specialist in this field, or change it yourself.
Do-it-yourself replacement of legs for ski poles:
- First you need to prepare a pot of clean water. It must be brought to a boil.
- At the same time, you need to start warming up the thermal gun (it can be purchased at any hardware or hardware store, as well as in the markets).
- Next, you need to wrap the sticks with cellophane 1.5-2 cm higher than the tips.
- Dip the unwrapped part in boiling water for 1 minute. Along with them, you need to lower the new tips.
- After waiting, you need to pull the paws out of the boiling water and try to remove them from the rod with twisting movements. If it does not work, you need to repeat the procedure with boiling water.
- Under the influence of high temperature, the old glue should melt and release the tip.
- When you pull the stick out of the water, you need to quickly remove the old foot, clean off the remaining glue from the rod.
- After that, you need to glue the bottom part in place. To do this, you need to take a thermal gun, and in a circle apply melted glue to the stick rod. Carefully slide the new platform onto it, keeping it centered.
- Wipe off excess glue and carefully inspect the resulting design. If it's uneven, you have time to straighten it before the glue sets.
This method is only suitable for expensive options made of carbon fiber. Cheap samples, include a large number of paper. Boiling water for such sticks will be fatal. In this case, you need to use a hair dryer or oven. If this is not possible, it is necessary to remove the tip, after putting a plastic bag on it.
For roller skiing, ordinary ski poles are used. Sticks for winter and for summer are the same length. Most roller skiers use light, stiff top poles with a high carbon content. In Russia, sticks from One Way, Swix, KV + are the most popular. Sometimes you can meet Leki, Exel, etc. Instead of winter “paws”, in summer you need to install tips for rollers, we will call them “pins” below. They are produced by all manufacturers of ski poles.
Not all brands of pins have good performance. Some suffer from bad plastic that either breaks in half (and you are instantly left without a tip) or gradually deforms (and the metal tip falls out over time). Some have a soft alloy metal tip that dulls it almost immediately after you start exercising. I tried all the models that are present on the Russian market, and I chose only two for myself: Leki and Vauhti. They are available with bore diameters of 8 and 10 mm. For my One Way sticks (9 mm), "ten" is suitable.
How to install a pin on a stick?
I propose step by step instructions. The whole process takes 15 minutes.
- Pour hot water from the tap into a small saucepan (to save time on heating it), put it on the stove. Immediately turn on the thermal gun:

A thermal gun can be bought at a hardware store (200-300 rubles). A hot glue stick is inserted into the hot-melt gun. Such rods are usually sold in sets in the same store as the heat gun:

It is necessary that the diameter of the hot-melt adhesive rod matches the diameter of the hole in the hot-melt gun. On sale, the most common diameter is 11 mm.
- After a few minutes, water boils, you need to lower the ends of both sticks with a ski foot (or with an old pin that you want to replace with a new one) and two new pins that you want to put on. In order for the foot / pin to expand and the hot melt adhesive inside to soften, keep it in boiling water for 30-60 seconds.
- Remove one stick from the pan and remove the foot / pin with your hands (with a glove or through a rag so as not to burn yourself). With a dry rag, wipe the excess of old hot-melt adhesive from the stick core. If the adhesive does not remove well, dip the rod into boiling water again for 20 seconds, and wipe the adhesive again with a rag.
- Make sure the heat gun is hot. This usually takes 8-10 minutes after the device is connected to the network. To do this, pull the trigger and check that the glue began to squeeze out of the nozzle of the heat gun.
Important: the following actions must be done very quickly, you have a matter of seconds:
- Take an ordinary table fork and catch one pin with its tip. Pour out the water from the pin. Next, take it in your hand, once strongly blow it with your mouth to remove the droplets of water that are present inside the pin.
- Apply hot glue to the end of the stick rod (1.5-2 cm) around the entire circumference. You need to apply in sufficient quantity, the excess will still be squeezed out later. It is undesirable that voids remain inside the pin. This will worsen the reliability of the fastening of the rod.
- Put the pin on the rod in such a way that at least approximately observe the centering of the pin relative to the handle of the stick. The metal tip should point forward (if we are talking about the direction of movement of the athlete with these sticks).
- Gently, holding the pin with your hand so that it remains stationary, wipe off excess glue with a rag with your other hand to make it aesthetically pleasing.
- Take the stick in your hands with the tip towards you and look at the light along the stick, checking the centering of the pin relative to the handle of the stick. If necessary, slightly tighten the pin around the axis so that the centering is perfect.
- Do the same with the second stick.
The above applies to sticks with a high content of carbon fiber (carbon). Cheap (not top-end) sticks basically have a lot of paper and using boiling water can make them unusable. In this case, it is preferable to use an oven or a hair dryer. In extreme cases, if there is nothing besides boiling water, you need to place a stick with a pin in a sealed plastic bag before lowering it into boiling water. But the warm-up time, for obvious reasons, will not be as short as without the package.
Alternatively, instead of a heat gun, you can use a building hair dryer, as shown in this video:
If you have too long a stick and you need to adjust it to your height, then you have to cut off a piece of the rod that is under the handle of the stick. Never cut off the lower part of the rod! In this case, you will have a rod of such a large diameter that not a single foot or pin will fit on.
If the handle of your sticks contains a cork, then to remove the handles with boiling water, place them in a bag. But the most effective is to use an oven (150-200 degrees) or a building hair dryer. It is very important not to melt the plastic parts of the handle (especially where the trap is inserted and secured). Therefore, do not rush to increase the temperature of the oven. Start at 150 degrees.
Important: be sure to remove the trap before using the oven or blow dryer as it contains synthetic materials that will inevitably melt! Also, do not leave in the handle the wedge-shaped plastic peg that secures the trap.
Hold the stick in your hands so that it does not touch the hot metal surfaces of the oven. The oven door will be half open. It may take a few minutes for the handle to warm up. Periodically remove it from the oven and try to pull off the handle (naturally using a glove or a rag so as not to burn yourself).
After removing the handle, cut off the extra centimeters of the stick shaft with a “hacksaw”. Lightly sand the sharp edges of the rod with sandpaper or a file. Reheat the handle in the oven before putting the handle on the stick shaft. Next, apply hot melt adhesive as above.
Important: with special care you need to work with a building hair dryer! It gives out a very high temperature, and the handle is very easy to spoil (melt).
I strongly do not recommend using materials such as electrical tape or adhesive plaster for sticking handles, paws, pins. Many times there have been cases where the foot / pin with such fasteners very easily slipped off the shaft during training / racing. I also do not recommend using glue, which then will not allow you to remove the foot / pin (epoxy, poxypol, supermoment, etc.). I know that some manufacturers of sticks, after complaints from racers, began to use some kind of serious adhesives that made it very difficult to remove the legs. Personally, I take this negatively. I think hot glue is a reliable and convenient tool. It never let me down.
How to sharpen pins?
Pins and legs are sold unsharpened. Many athletes only think that they are imprisoned. But it's not. They have a so-called "platform". With such a platform, traction with asphalt will not be ideal. But if you don’t need to carry out any additional manipulations with the paws for skiing, then the pins for asphalt must be sharpened, even if they are straight from the store.
The working angle of the tip should be fairly sharp. Take a look at the picture. On it, for convenience (so as not to clutter up the picture), the corners with outside tip. But we are interested in interior angles. From the school geometry course, you must remember that the angles between two straight lines on both sides are congruent. Now compare angles 1 - 3:

Corner 1 - a new tip with a platform (from the store).
Angle 2 - the tip is sharpened with a sharpener.
Angle 3 - the tip is very worn, while this angle does not allow you to reliably cling to the asphalt at the time of the push.
Why is a platform not needed? Why does it need to be sharpened right away?
On this topic, disputes once broke out on the Internet. Some users thought that the platform was needed. They just couldn't explain why. And they even recommended sharpening the tips in such a way that this platform is recreated each time. The following picture shows that their position is untenable:

Let's simulate the grinding of the tip on the asphalt during the training process and draw a line with a pink marker. Outside this line, what will be worn off on the asphalt will remain. And now let's see what area of contact with asphalt will turn out in three cases. Obviously, the largest area is in the rightmost figure. Further - on the very left (where there was a tip with a platform). The smallest area is in the central figure. This tip (of the three available) will cling to asphalt the best.
Thus, the sharpening angle of the tip is key factor for reliable grip on the asphalt throughout your workout or race. To maintain such an angle, you need to grind the pins before each workout. The main tool is a sharpener with a diamond wheel:

The working surface, literally a few mm wide, is located on the outside of the circle (near the very edge). Our industry does not produce such ready-made sharpeners. But there are craftsmen who make such a useful device from some 12-volt engine removed from a car.
An additional tool is a diamond-coated file:

It is also possible to use a diamond-coated file, but I do not recommend it, because due to the small size it is inconvenient to work with them: the file constantly jumps off the tip.
Before one workout, I use a sharpener, before one or two subsequent workouts, I only undermine a little with a file. Why? Because after one or two undercutting with a file, the angle of the tip ceases to be optimal. It is difficult to deduce the correct angle with a file, but a sharpener copes with this easily.
You need to sharpen the tip on both sides - from the inside and from the outside (in the direction of travel). Why? Because sometimes, from accidental striking with sticks on the asphalt (at the time of setting the sticks), chips appear on the metal from the inside. The inner side must be aligned, and then the sharp corner must be re-drawn from the outer side.
I do not advise using a sharpener without diamond coating. You will not really sharpen the Pobedite alloy of the tip, and the tip and plastic will overheat, which will lead to damage to the pin.
And change the pins in a timely manner! Here is the extreme wear of the pins:

Treat pins like consumables, not something permanent. Do not try to spread the use of one pair of pins over several seasons. I have one pair at best enough for 1 month. Therefore, I immediately buy several pairs before the season.
In conclusion, I give a photo of well-sharpened tips. I note that these specimens are not new and have survived more than one sharpening: